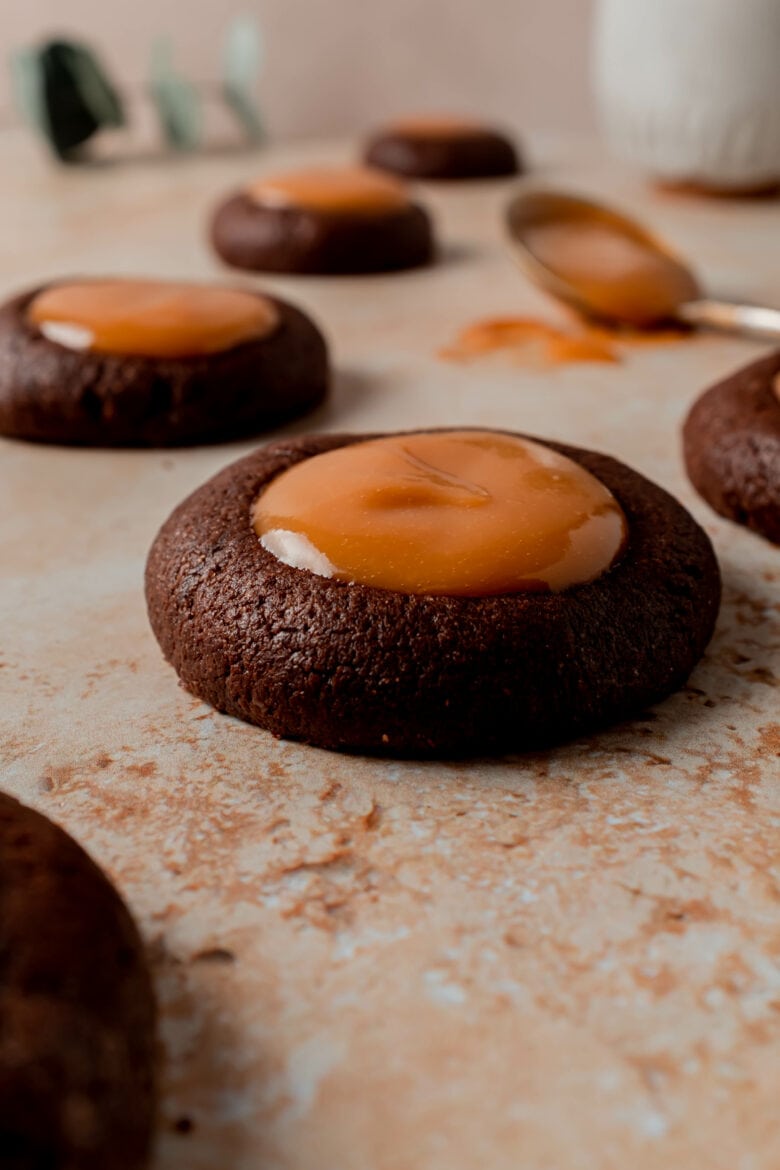
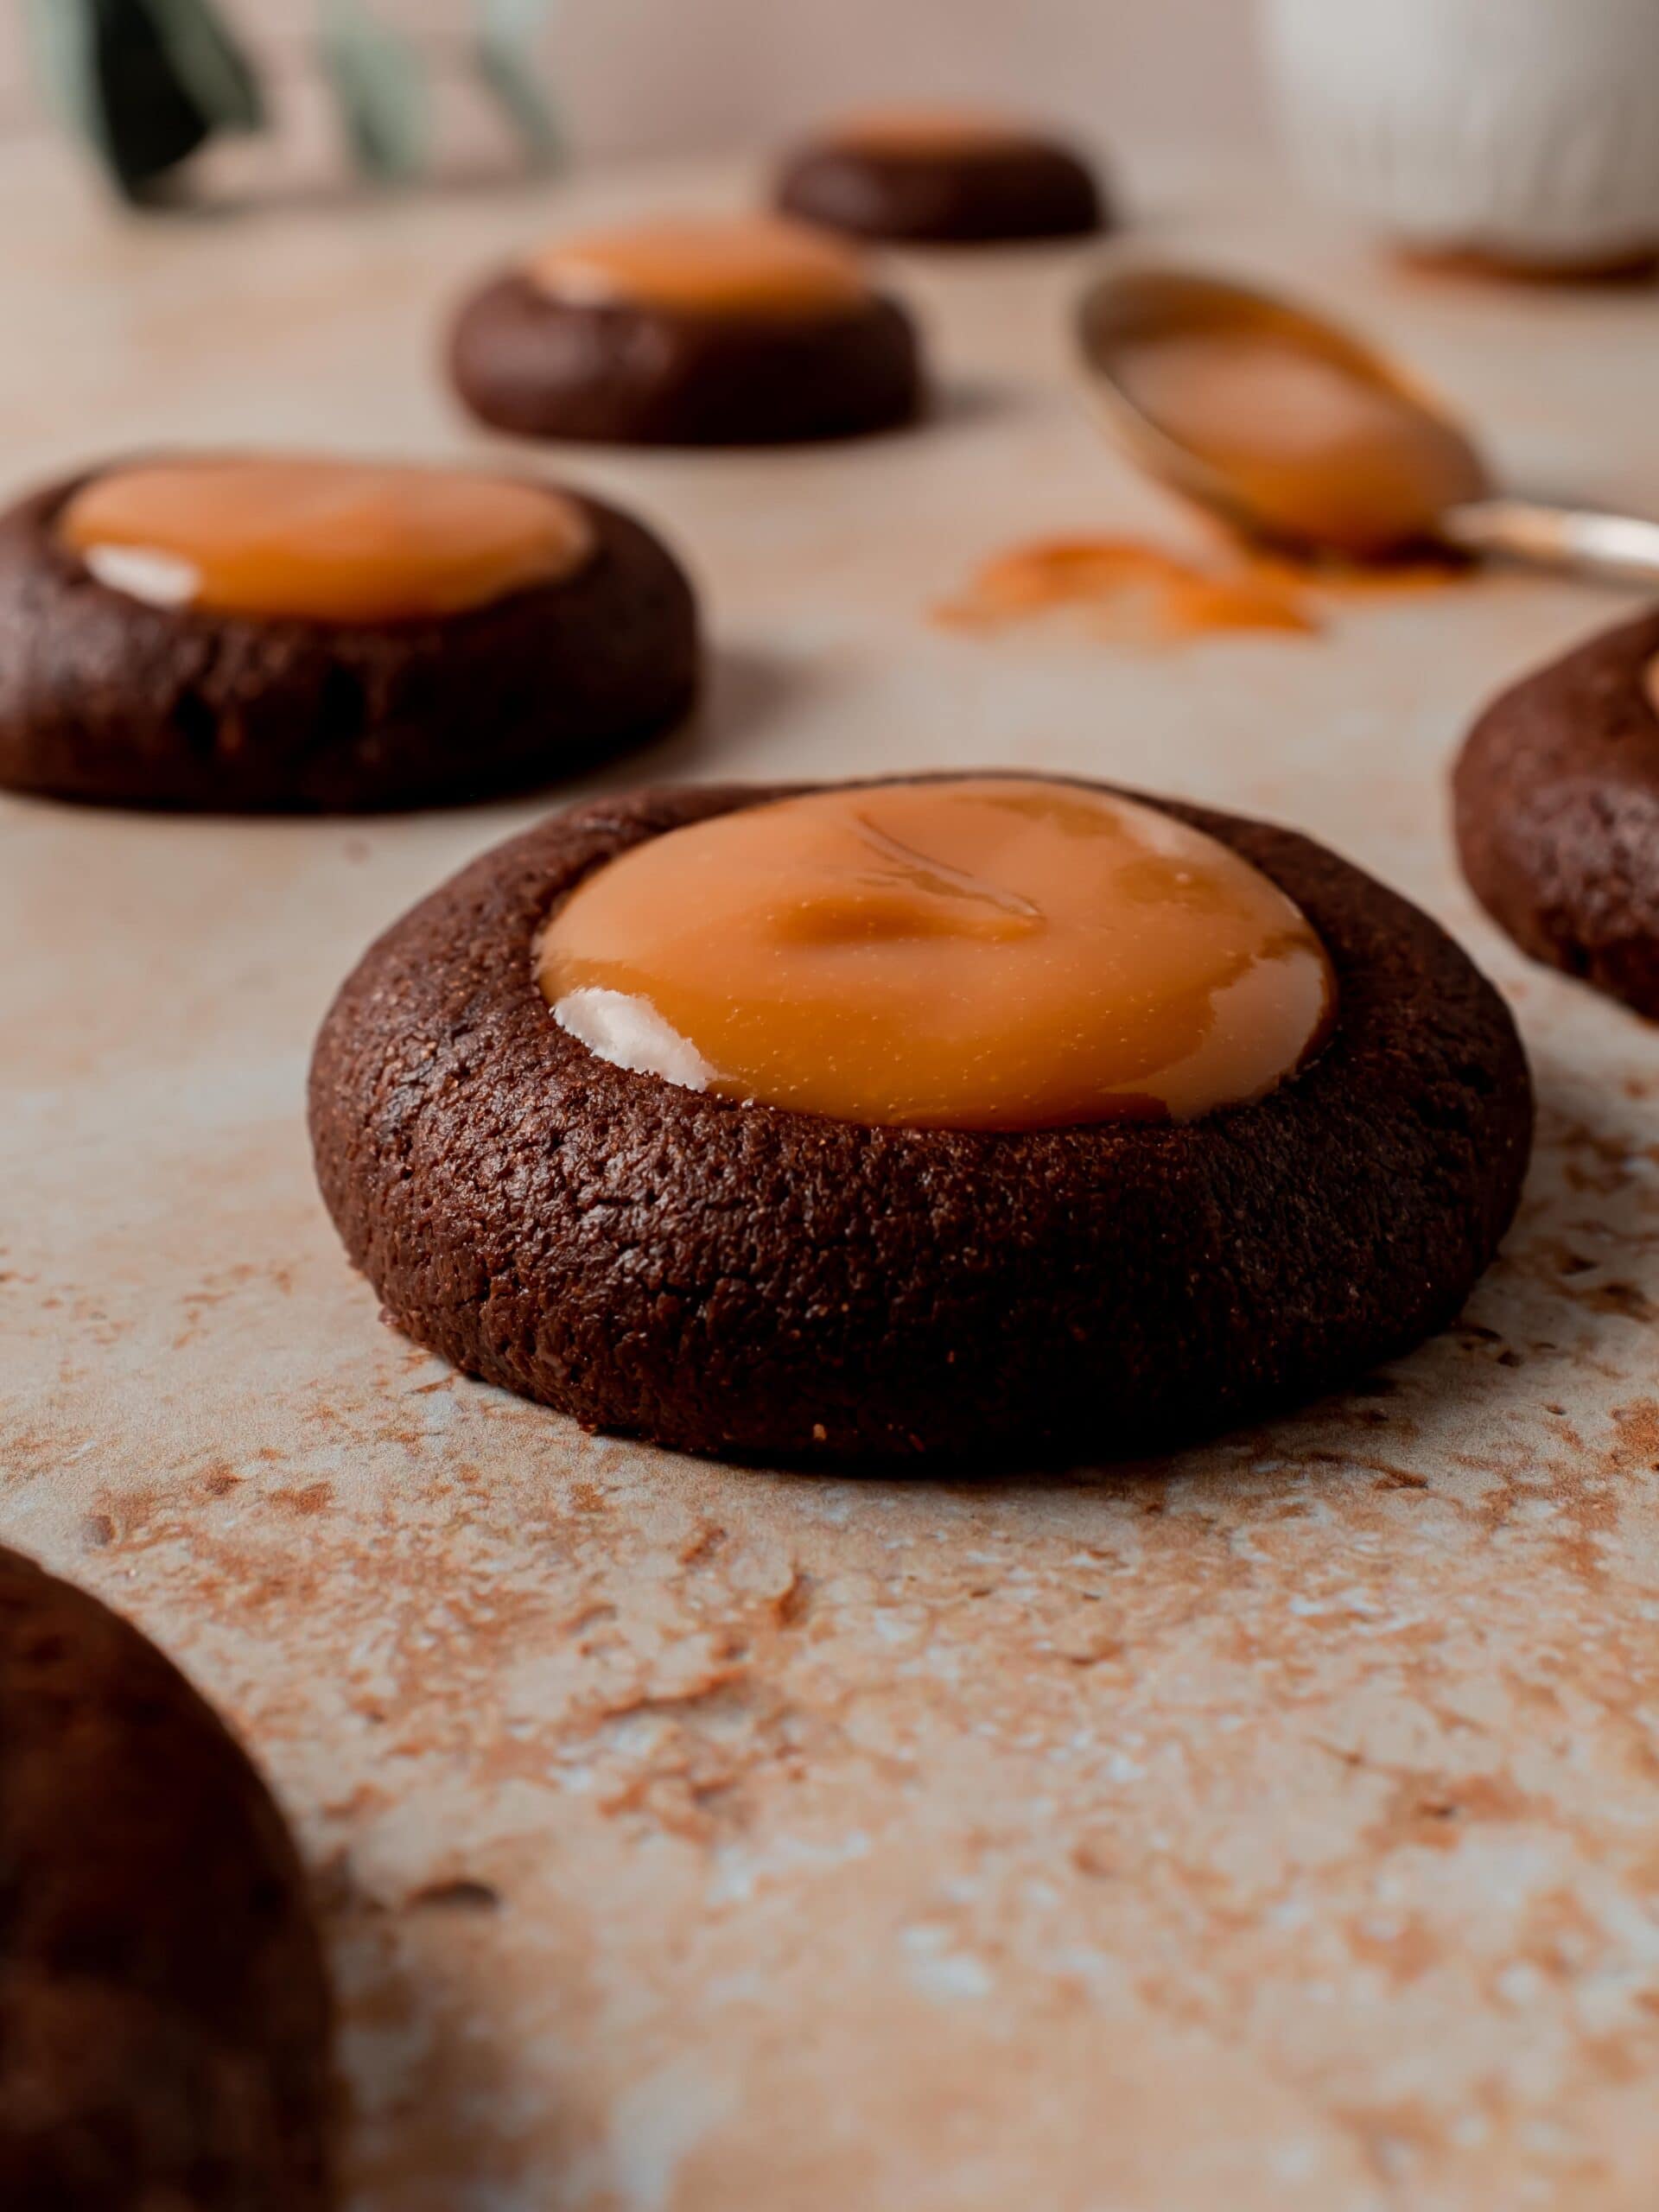
These decadently rich chocolate dulce de leche cookies are easy to make and so delicious! Start by whipping up a batch of our quick chocolate thumbprint cookies and then top them with a heaping spoonful of homemade dulce de leche!
Meet our new favorite dessert: dulce de leche cookies! They’re rich, chocolatey and filled with homemade dulce de leche! The chocolate thumbprint cookies can be whipped up in less than an hour. And the filling is an irresistibly smooth and creamy dulce de leche that’s made with just milk and a handful of pantry ingredients. Every bite is pure magic!
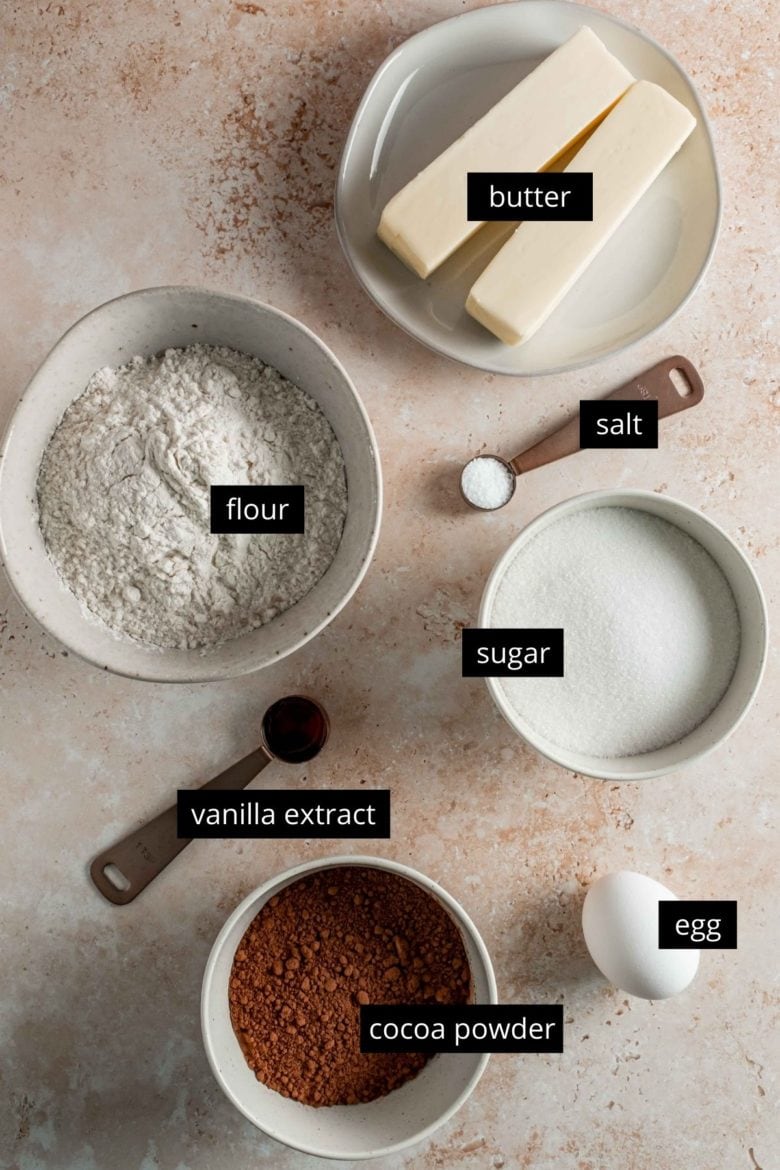
Recipe Ingredients
This dulce de leche cookies recipe includes chocolate thumbprint cookies and homemade dulce de leche!
Chocolate Thumbprint Cookie Ingredients
- Butter
- Granulated sugar
- Egg
- Vanilla extract
- All purpose flour
- Unsweetened cocoa powder
- Salt
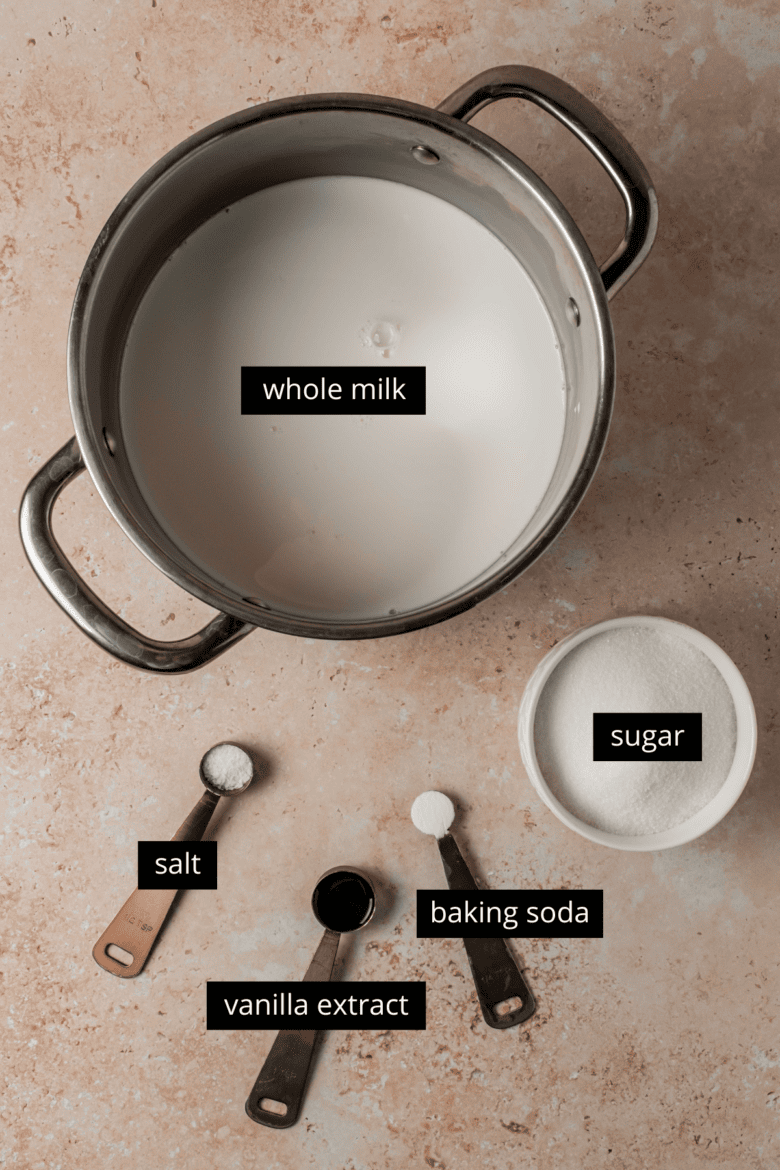
Homemade Dulce De Leche Ingredients
- Whole milk
- Granulated sugar
- Baking soda
- Salt
- Vanilla extract
Step By Step Instructions
Making the Cookies
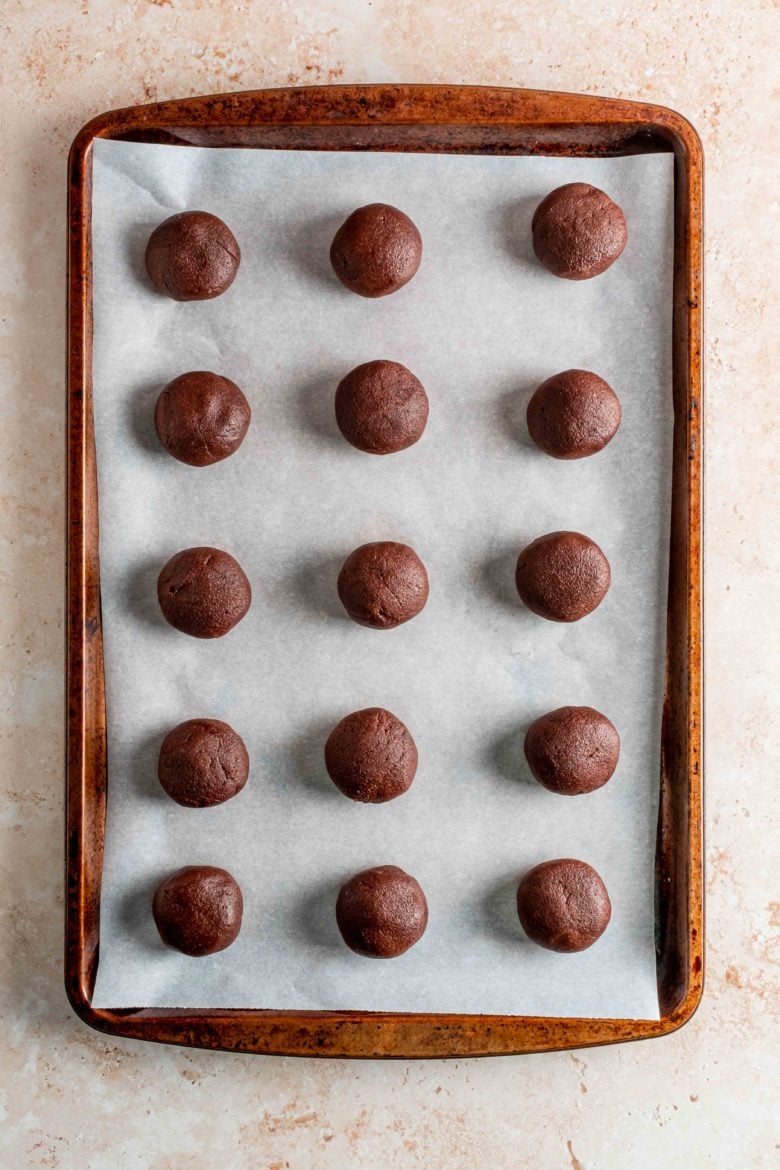
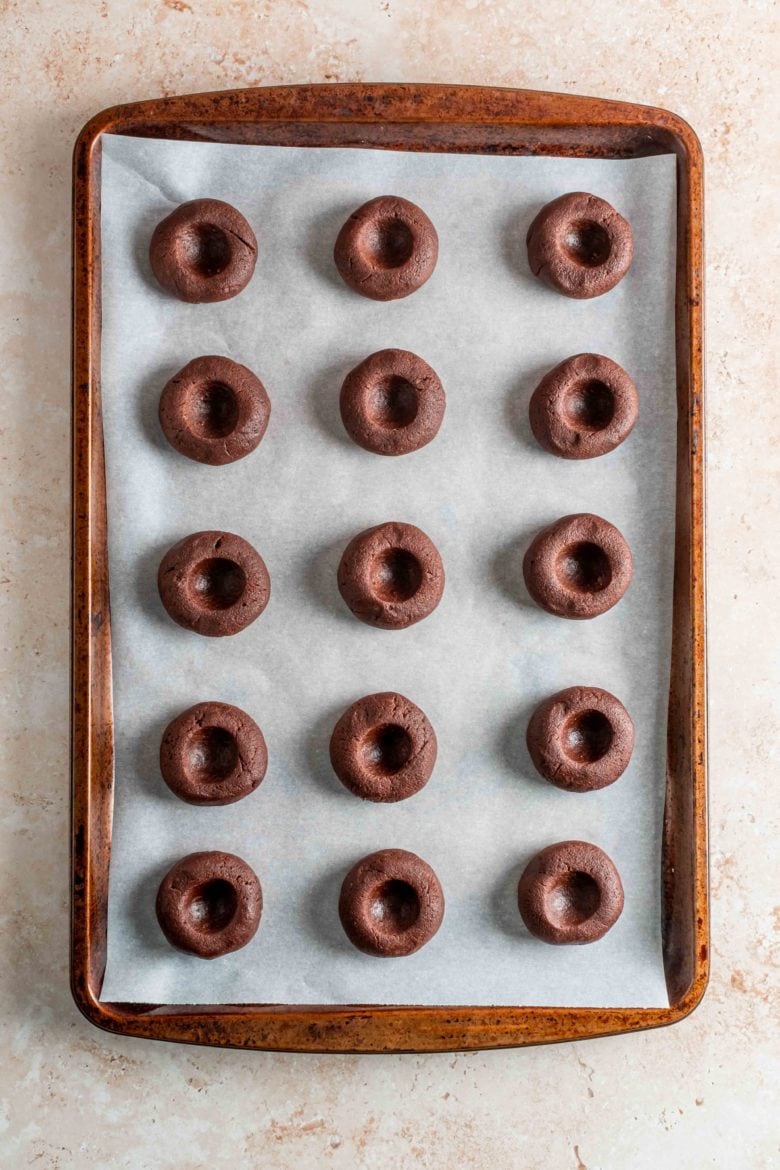
The dough for this dulce de leche cookies recipe can be whipped up quickly. After mixing together the ingredients, let the dough chill in the refrigerator for an hour.
Once the dough has rested, form it into 24 dough balls. Then use the back of a teaspoon or your thumb to make an indent in the center of each cookie. Bake for 12-14 minutes at 350°F (180°C) and your cookies are ready!
QUICK TIP: Sometimes the indents pop up a little bit after baking so I always find it helpful to press them down again right out of the oven while they’re still hot!
Homemade Dulce De Leche
If you’re not familiar with dulce de leche, it’s a caramel-like confection that’s especially popular across many Latin American countries. It’s made by simmering milk and sugar until the mixture turns a deep golden brown and takes on a spread-like consistency. While it does take about an hour or so on the stovetop, I find that preparing dulce de leche is much less fussy than making something like caramel!
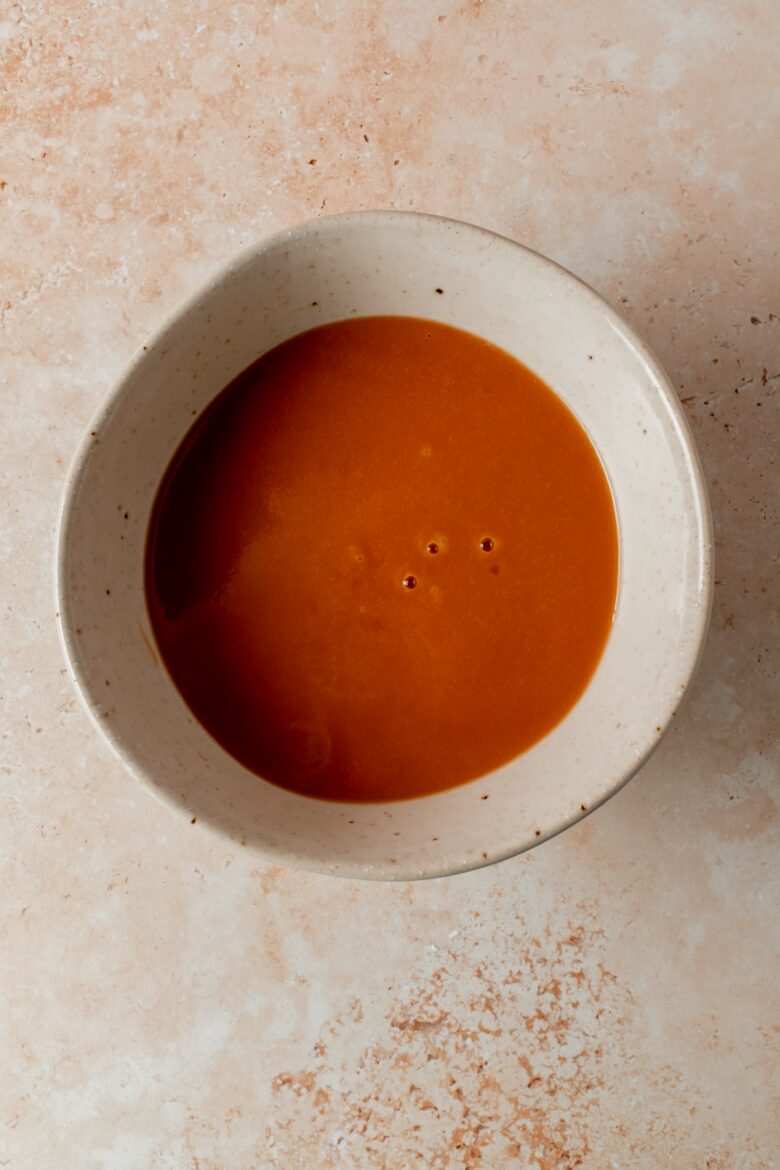
To make this dulce de leche, simmer milk, sugar, salt and a pinch of baking soda in a pot over medium heat. The baking soda is optional, but will help to make sure your dulce de leche is silky smooth. If using baking soda, just make sure you have a large pot, as the mixture will bubble up and expand considerably for the first 15 minutes — you’ll need to constantly keep an eye on the mixture and stir regularly.
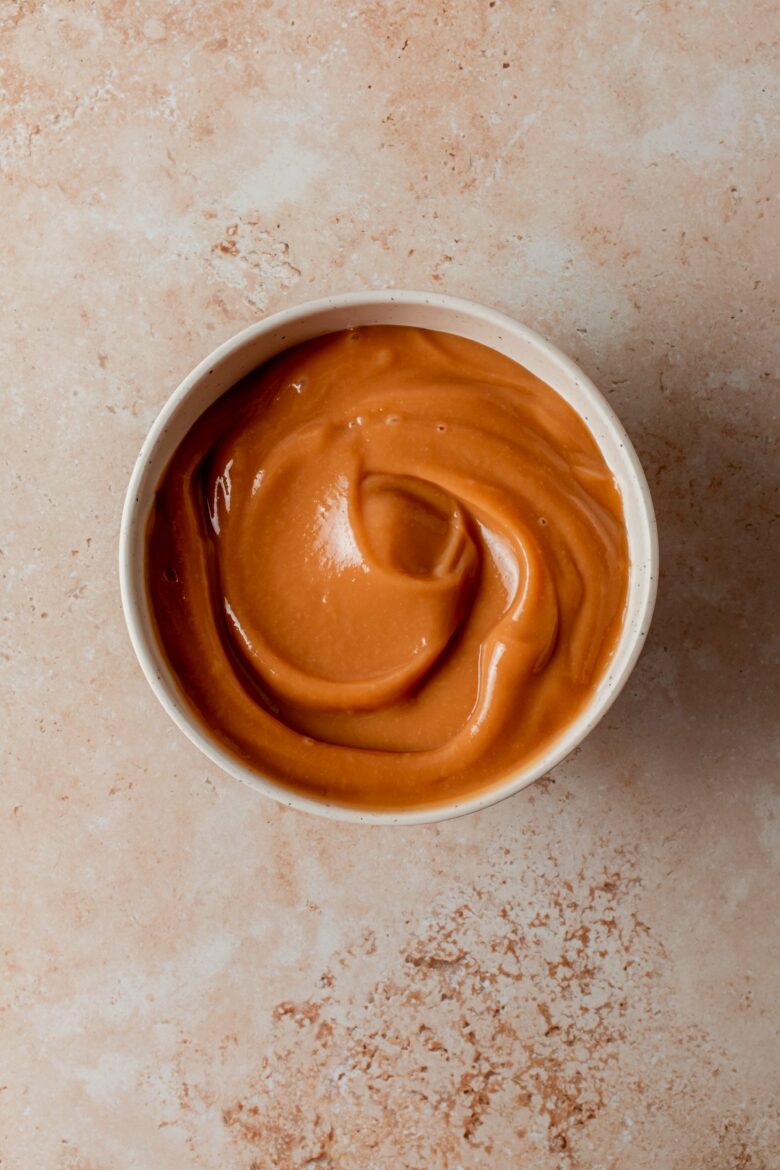
Once the bubbling subsides, just give your mixture a stir every 10 minutes until it turns a light brown color. The change in color is your signal to start stirring the pot more frequently to prevent any burning. Once the mixture takes on a golden caramel color you can remove it from heat and stir in a bit of vanilla (optional). Now try a big spoonful and save the rest for your cookies!
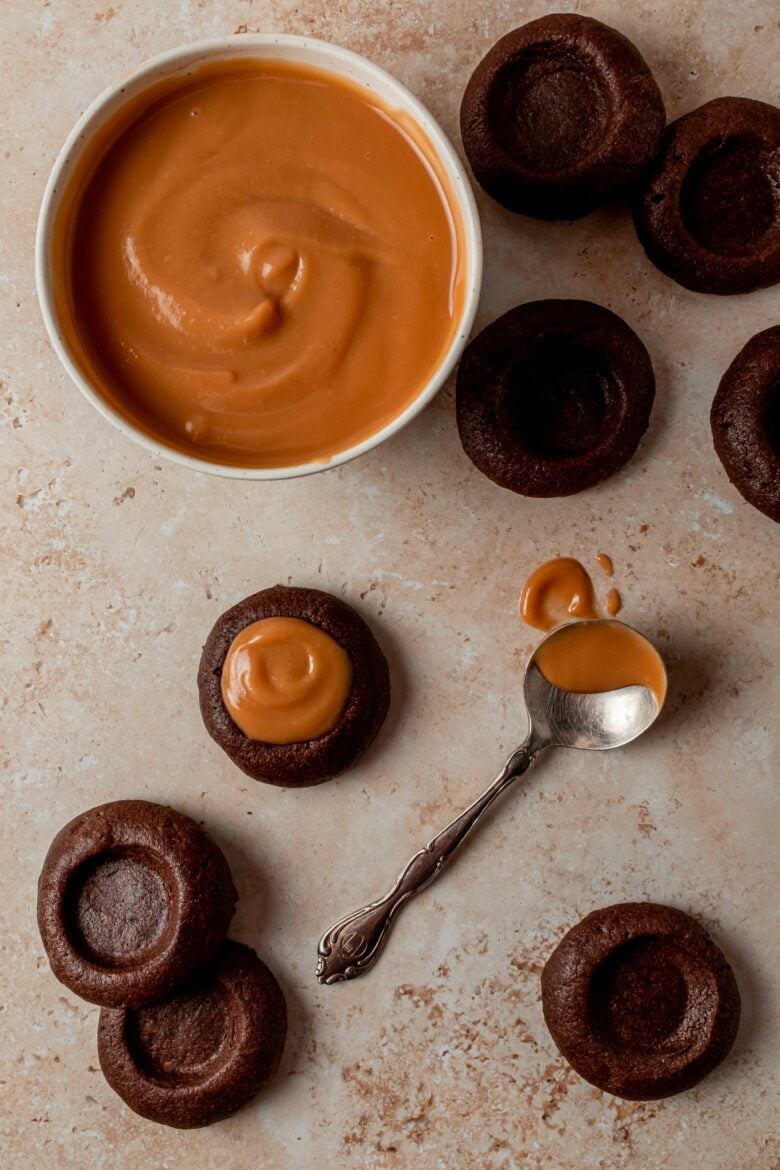
Make Ahead: You can make the dulce de leche ahead of time and then reheat slightly when you’re ready to fill the cookies. Reheating the dulce de leche isn’t necessary, but it’s easier to fill the cookies when the dulce de leche has a pourable consistency.
Expert Tips And Tricks
- To ensure the thumbprint cookies hold their shape, you can place the formed cookies in the fridge for 30 minutes before baking.
- Don’t overbake the cookies. They should be firm around the edges but slightly soft in the center. Remember that they will continue to cook a bit after you remove them from the oven.
- To test if your dulce de leche is done cooking, drop a spoonful on a cold plate. Let the dulce de leche rest for a minute or two. If the dulce de leche holds its shape pretty well, it has finished cooking.
- Make sure the cookies have cooled completely before adding the dulce de leche.
- It’s easiest to fill the thumbprint cookies when the dulce de leche is warm and at a pourable consistency. If you’ve made your dulce de leche in advance, just pop it in the microwave and heat it in 30 second increments until warm.
Frequently Asked Questions
Dulce de leche is a sweet, caramel-like spread that is made by heating milk and sugar until the mixture thickens and turns a beautiful golden-brown color. It’s a confection popular across many Latin American countries and is the filling in alfajores (a classic South American sandwich cookie).
Dulce de leche is ready when it has a rich caramel color and begins to thicken. When dipping a spoon into the mixture, the dulce de leche should coat the spoon without running off easily.
Yes! Just make sure to use a high quality brand, as the dulce de leche will affect the overall flavor of your cookies.
Try stirring your leftovers into a cup of coffee, drizzling it over crepes or spreading it on a warm piece of toast!
Yes! This step is absolutely necessary to ensure the cookies keep their shape in the oven.
This often happens if your cookie dough gets too warm and the butter becomes too soft or melted. To prevent too much spreading, you can place your formed cookies on the pan and then transfer to the refrigerator for half an hour before baking.
Storage and Freezing
You can store dulce de leche cookies in an airtight container in the fridge for up to 3 days. If stacking the cookies, make sure to place a sheet of parchment paper between layers to prevent sticking.
If you’d like to freeze these cookies, I recommend freezing just the chocolate thumbprint cookies and adding the dulce leche filling when you’re ready to enjoy the cookies. Frozen chocolate thumbprint cookies will keep well in the freezer for up to 3 months.
Recipe Variations
You can really fill your chocolate thumbprint cookies with anything you’d like! Here are a few ideas:
- Add a toasted coconut and pecan filling to make German chocolate cookies.
- Make double chocolate cookies by adding chocolate ganache.
- No time to make dulce de leche and can’t find it at the store? Try adding salted caramel for a similar flavor!
- Top your chocolate cookies with raspberry jam for the perfect balance of sweet and tart.

And if you loved these dulce de leche cookies, make sure to check out these recipes!
- chocolate chip strawberry cookies
- pryaniki | russian honey spice cookies
- chocolate kahlua macarons
- chocolate chip walnut cookies
Dulce De Leche Cookies Recipe
- Total Time: 1 hour 27 minutes
- Yield: 24
- Prep Time: 1 hour 15 minutes
- Cook Time: 12 minutes
- Category: dessert
- Method: baking
- Cuisine: global
Ingredients
Chocolate Thumbprint Cookies
- 1 cup (230 grams) unsalted butter, softened
- 1 cup (200 grams) granulated sugar
- 1 large egg
- 1 teaspoon vanilla extract
- 2 cups (240 grams) all purpose flour, spooned and leveled*
- ½ cup (60 grams) unsweetened cocoa powder
- ½ teaspoon kosher salt
Homemade Dulce De Leche
- 4 cups (1 L) whole milk
- 1 cup (200 grams) granulated sugar
- ¼ teaspoon kosher salt
- ¼ teaspoon baking soda
- ½ teaspoon vanilla extract
Instructions
Chocolate Thumbprint Cookies
- Cream the butter and sugar together on high with an electric mixer.
- Add the egg and vanilla extract and mix until combined.
- Slowly mix in the flour, cocoa powder and salt until the dough comes together.
- Cover the dough and place in the refrigerator for 1 hour.
- Preheat the oven to 350°F (180°C) and line a baking sheet with parchment paper.
- Form the dough into balls and make an indent in the center either with your thumb or the back of a teaspoon.
- OPTIONAL: If your cookie dough is warm, consider placing the formed cookies in the fridge for half an hour before baking to ensure they keep their shape in the oven.
- Place the formed cookies on the baking sheet leaving a bit of space between them and bake for 12-14 minutes.
- If the indent has puffed up during baking, gently press back down.
- Let the cookies sit for 10 minutes and then remove to a wire rack to cool.
- Once the cookies are cool, fill with dulce de leche.
Homemade Dulce De Leche
- Add the milk, sugar, salt and baking soda to a large heavy-bottomed pot.
- Place the mixture on the stove over medium heat and let simmer for approximately 1-1.5 hours. Adjust the temperature so it remains at a good simmer; we don’t want the mixture to rapidly boil.
- For the first 15 minutes keep a close eye on the mixture – the baking soda will cause the milk to expand and bubble considerably so you’ll need to stir the mixture regularly.
After the bubbling subsides, check on and stir the dulce de leche every 5-10 minutes until it begins to turn a light brown color. That’s your signal to start stirring the dulce de leche more frequently to prevent burning. - When the mixture has slightly thickened and reached a deep brown color*, remove from heat and stir in the vanilla extract. Allow to cool to room temperature. Then store in an airtight container in the refrigerator until ready to use.
Notes
Spooned and leveled flour: Scooping a measuring cup into a flour container can result in much more flour than intended, which can affect the look and taste of your cookies. To get a more accurate measurement, use a spoon to scoop flour into the measuring cup until it’s completely full. Then run the back of a knife over the cup to gently scrape off any excess.
Dulce de Leche: To test if your dulce de leche has finished cooking, drop a spoonful on a cold plate and let it sit for several minutes. If the dulce de leche holds its shape and isn’t runny when you tip the plate a bit, it’s ready!
Storage: Assembled cookies will keep well stored in an airtight container in the fridge for up to 3 days.
This post may contain affiliate links through which we may earn a small commission at no additional cost to you. We only recommend products that we genuinely love and would use ourselves.